HMI Tutorial
coast

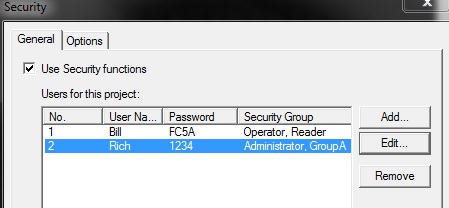
There are two types of security groups. One type protects access to data. The other protects displays and operations. To protect the HMI display and operations, you can create a security group to a user. There are three user accounts to protect data which are the: Administrator, Operator and Reader each can only be used once. There are can be up to 12 user created security groups. Each user created security account can up to 15 user accounts associated with each.

Administrator has complete access to project data.

Operator can partially change project data by changing device values

Reader can read data stored on external memory devices.


Creating User Accounts
robotCreating User Accounts

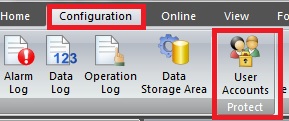
From the Configuration tab, in the Project group, click User Accounts The Security dialog box is displayed


robotAdd New User

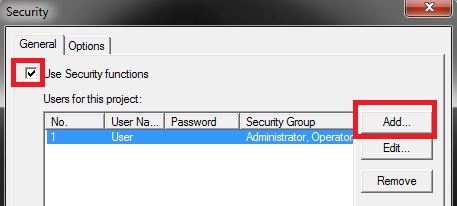
Select the Use Security functions check box. Click Add and the New User Account dialog box is displayed. Once you have selected Use Security Function you have password protected your project.


robotIndividual Setting

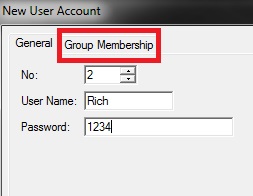
Specify the user number from 1 to 15. Enter the User Name up to 8 characters. Enter in Password 4 to 15 characters. Only upper case characters and numbers may be used. Click the Group Membership tab


robotAdd Security Group

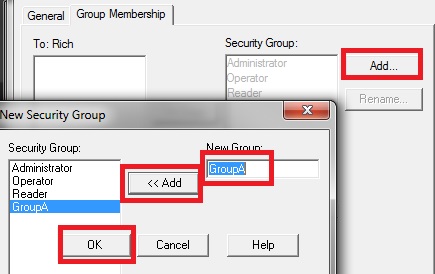
ClickAdd ane enter a New Group name up to 15 characters and click Add and OK


robotAdd Group to User account

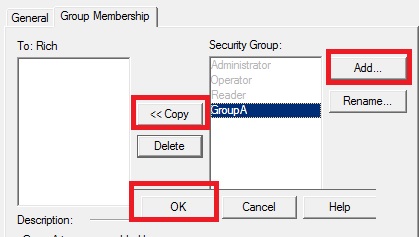
Select the security group that you created in step 4 and clickCopy and OK


robotAdd Group to User account

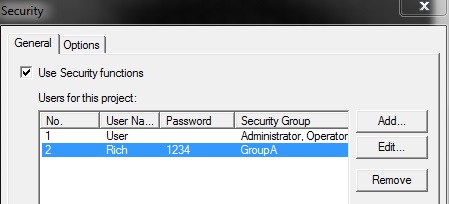
Repeat steps 2 through 5 to add more users. Click OK to finish


Editing User Accounts

robotEdit Users

From the Configuration tab, in the Project group, click User Accounts The Security dialog box is displayed


robotSelect User

Select the account to edit and click Edit


robotGeneral Tab

In the General Tab change the User Name and Password


robotGroup Selection

Click the Group Membership Tab then select Administrator and click Delete then click OK


robotSelect New User

Select a the user you created in the first lesson above and then click Edit


robotMove Security Group

Click Group Membership and select Administrator and then Copy This will make it so this user can be administrator and part of Group A. As mentioned in the intro there can only be one administrate, one operator and one reader so we had to delete the administrator from the other user so that this user could have it. Click OK

robotSecurity Group Overview

Your first User should not be set up as an administrator and is the only one.


Password Protect a Screen and Parts

robotPassword Protect Screen

Now that you created Security Groups, you can easily password a screen. In Lesson 2 when you created a new base screen you had your screen properties appear. If you go to the Options Tab and select a security Group.

robotPassword Protect Screen

If you already have created the base screen, you can also just right mouse click the screen and go to Propertiesscreen which will bring you to the same screen as in step one for the option tab to set the security on the screen.


robotPassword protect bit button

To password protect a bit button you would double click on it and make sure the Advanced Tab is selected to give more options at the top which will not have an Option Tab.


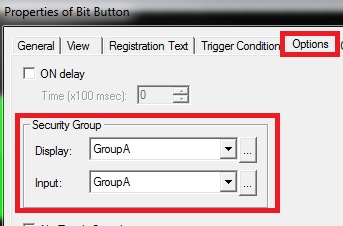
robotPassword Protect Bit Button

In the Option Tab you can select whether to password protect the display of the button and password protect the operation of the button